How to?
How to add a machine to your Connect fleet
1. Select machine
- Start from My fleet / My machines*
- Select ‘Add Machine’
- Enter machine VIN and select ‘Search’.
- The machine model should auto-populate. If doesn’t, select it manually and confirm to move to step 2.
*Machines can also be added via Subscriptions
2. Select service center
- Select your country from the list
- Identify your local dealer service center from the list and confirm
- Check the service center address and contact details to verify your selection
- Select ‘Select service center’ to move to step 3.
3. Summary
- Use the summary statement to verify your machine details, service center selection and subscription plan.
- Select ‘Subscribe’. The subscription request will then be sent to your dealer for approval.
Machine data will be visible when:
- Your dealer recognizes and accepts the subscription request and;
- The telemetry device is activates and data is received.
The machine must run for an extended period following this subscription request to activate the device and send data.
How to change a machine name
Make it easy to identify a machine in your fleet by changing its display name.
- Start from My fleet / My machines
- Select machine requiring name change
- Select ‘Information’ tab
- Select ‘Edit information’
- Enter new name
- Save changes
How to change ownership?
Delete a machine from your account to make it discoverable for registration by another user*.
There are two stages to deleting a machine for a change of ownership.
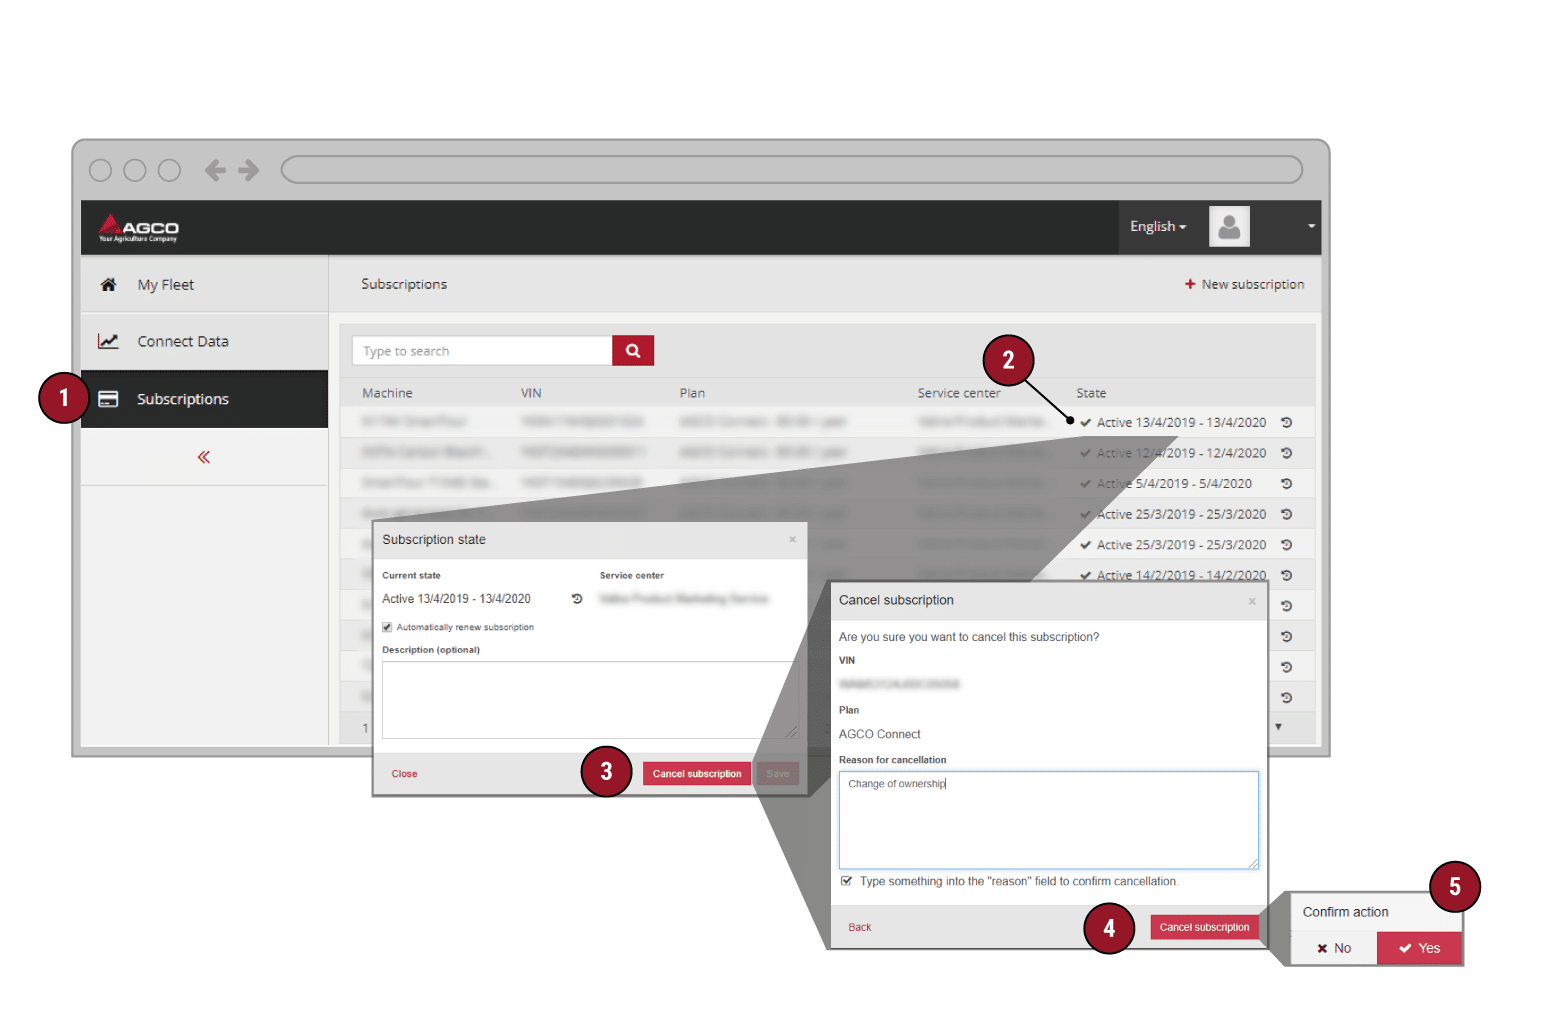
1. Cancelling the subscription

- Select subscriptions screen from the menu
- Open the subscription state information box of the machine you want to unsubscribe
- Click ‘Cancel subscription’
- Verify the VIN number of the machine you want to unsubscribe. Enter a reason for cancellation and click Cancel subscription.
- Click Yes to confirm unsubscribe
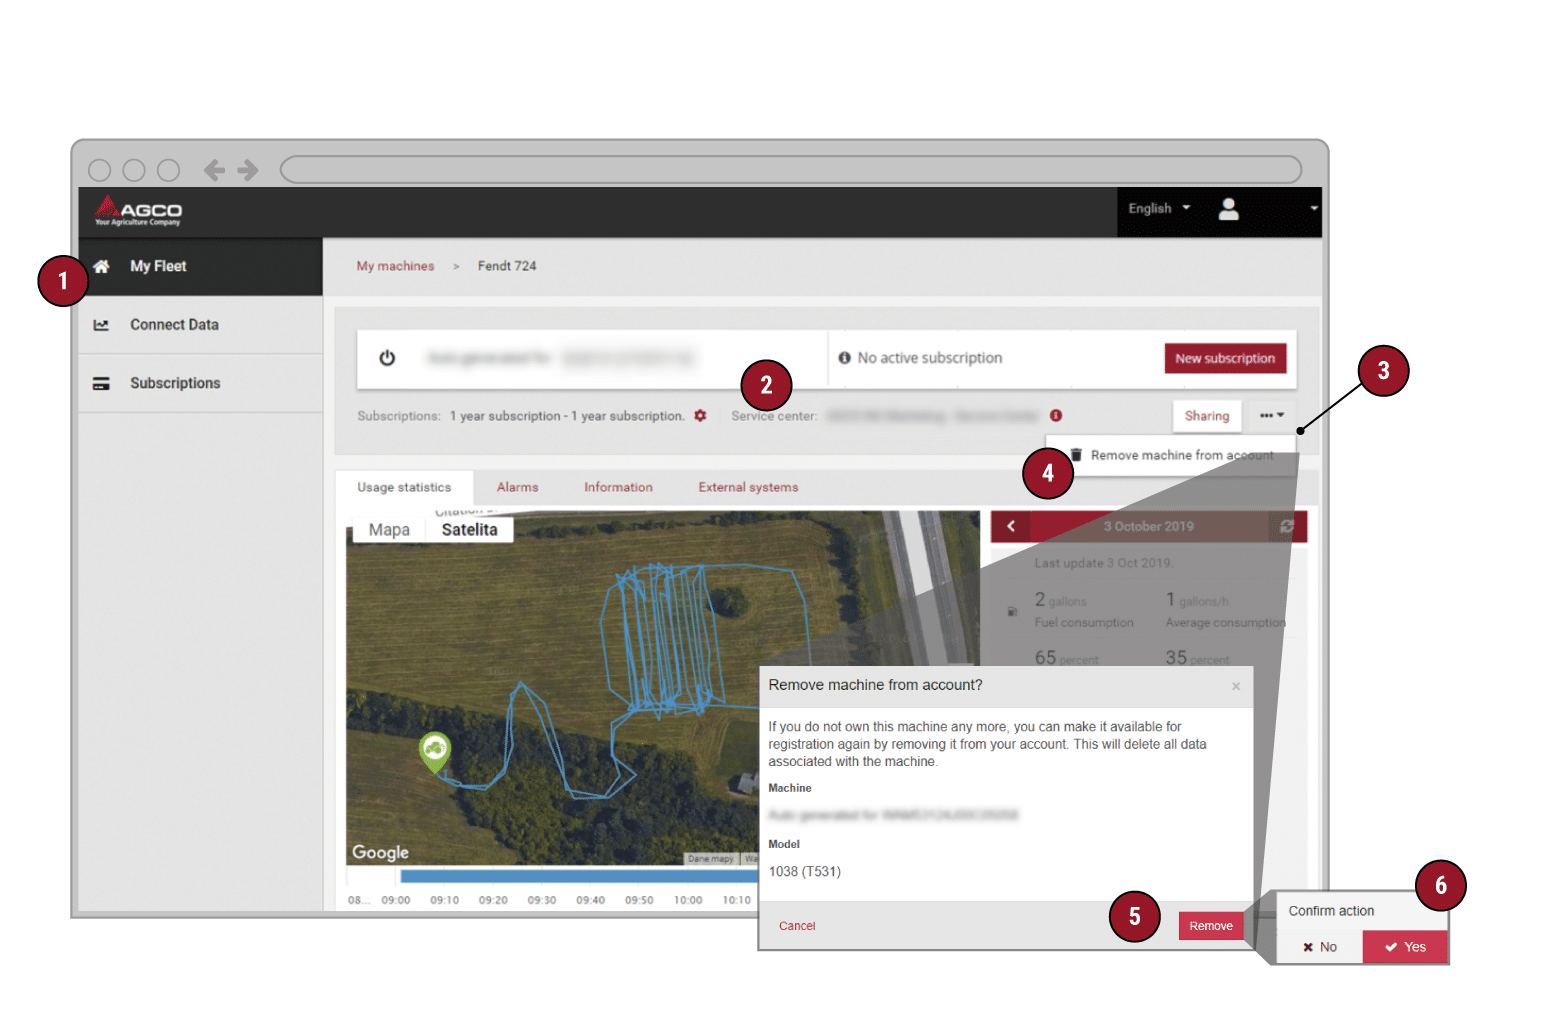
2. Removing a machine from the account

- After cancelling the subscription, go to ‘My Fleet’
- Select the machine that shows ‘No active subscription’ to expand the machine information.
- Select ‘other options’

- Click
 ‘Remove machine from account’
 - Confirm machine details and click ‘Remove’
- Click ‘Yes’ to confirm removal
The machine will now be available for registration by the new user by following the instructions on – “How to add a machine”
* The new user will not see any historic data as data is deleted when the machine is removed.
How to understand service alarms
Service alarms indicate that your machine may need attention and help identify the issue and severity.
![]() Indicates one or more
Indicates one or more ![]() alarm occurrences within the last 72 hours*
alarm occurrences within the last 72 hours*
Select a machine and select the ‘Alarms’ tab (1) to expand the alarm history list, as shown*
Alarms are classified according to severity, and the number of occurrences are listed next to the classification code (2)
Time stamps show the first and last occurrence (3)
Select ![]() for further description and full details of the alarm
for further description and full details of the alarm
Service code classification
 Most severe

 Least severe
* Alarms remain in the history list for 72 hours from last seen timestamp, but can be cleared sooner or held longer by the service centre during investigation.